2013年11月18日 星期一
2013年7月24日 星期三
2013年7月18日 星期四
2013年6月15日 星期六
2013年3月16日 星期六
2013年3月10日 星期日
2013年3月3日 星期日
2013年2月27日 星期三
2013年2月22日 星期五
2013年2月14日 星期四
【Joomla DEBUG】System Check 空白、隱藏ERROR
若在Joomla的System Check時,轉了老半天仍是空白一片....
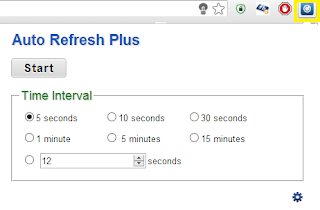
(我們就需要讓系統有多點時間把所有的錯誤訊息跑出來)
(我們就需要讓系統有多點時間把所有的錯誤訊息跑出來)
2013年2月10日 星期日
【Joomdle DEBUG】System Check 遇到的錯誤
- 第一次遇到的錯誤,如圖一:(電腦在有固定IP網域)
- Moodle cannot connect to Joomla (Joomla在Moodle上的位置錯誤)
- An unexpected error happened 404: Unknown error (設定沒做完)
 |
| 圖一 |
- 第二次遇到的錯誤,如圖二:(把電腦移到沒有固定IP的網域後)
- Joomla cannot connect to Moodle (Moodle在Joomla上的位置錯誤)
- Moodle cannot connect to Joomla (Joomla在Moodle上的位置錯誤)
- Received empty response from Moodle
 |
| 圖二 |
2013年2月9日 星期六
【Joomdle】 設定(optional)
Advanced Moodle Configuration (Optional)
Removing the default Moodle login page (redirect the Moodle login page to Joomla!)
- Define an alternate login URL for Moodle, so that Moodle users never see the Moodle login page. We recommend that you don't enable this until everything is up, testing, testing again, tested one more time, and running. Oh did we say, test first before you do this!
- Site administration->Plugins->Autenticathion->Manage autenthication: Alternate Login URL. Here we put Joomla URL.
- If you are using Moodle in a wrapper, you can use this URL, so Joomla login page won't appear inside the wrapper:http://yoursite.com/components/com_joomdle/views/wrapper/getout_login.php
2013年2月8日 星期五
Joomla! 與Moodle 環境建置
XAMPP:下載─portable
解壓縮後,以管理員身分執行「xampp-control.exe」
開啟「Apache」及「Mysql」
Joomla!:下載
Moodle:下載
解壓縮後放至:xampp/htdocs
瀏覽器:localhost
新增Joomla與Moodle的資料表
瀏覽器:localhost/joomla,開始安裝Joomla!
瀏覽器:localhost/moodle,開始安裝Moodle
2013年1月22日 星期二
Eclipse 專案架構
專案架構
- src
- 包含Adroid 應用程式所需的各個程式碼檔案
- gen
- 自動生成的檔案
- 關鍵檔:R.java
- res
- 所有程式用到的資源檔案,例如資料檔、圖片,或編譯時程生的XML描述檔
- layout
- XML介面描述檔
- values
- XML格式的參數值描述檔,包含字串、陣列、顏色、風格等
- drawable
- 所有圖示、圖片檔
Eclipse 建立模擬器
建立模擬器
- 開啟Eclipse
- 選單「Window」→「AVD Manager」
- 右側按鈕「New」
- 在「Name」欄位自行設定模擬器名稱
- 按下「Target」選擇模擬器版本
- 按下右下角按鈕「Create」,即新增完成
若為開發測試,建議先以低版本模擬器做測試
在執行模擬器時,若出現當機或APP未關閉而無法執行的情況時,可由ADV Manager開啟模擬器,將手機程式關閉
Eclipse 環境建置
安裝流程:
- 下載並安裝Java開發工具
- Java SE, Standrad Edition→Download JDK
- 下載並安裝Eclipse整合開發環境
- Eclipse IDE for Java Developers
- 解壓縮後即可執行
- 安裝ADT擴充套件
- 執行Eclipse後,選單列 Help→Install New Software...
- Work with欄位中輸入「http://dl-ssl.google.com/android/eclipse/site.xml」
- 按下「Add...」按鈕
- 彈出「Add Site」對話框,在「Name:」欄位中,輸入任何名稱,並按下OK鍵
- 全選「Developer Tools」後,按下「Next」準備安裝,Eclipse將自動安裝,安裝完後,按下Finish,並重新啟動Eclipse
- 安裝過程中需與網路連線,建議在網路通順時安裝
- 下載Android SDK工具包
- 解壓縮後,放置eclipse資料夾中
- 設定SDK
- 啟動Eclipse
- 選單列「Window」→「Preferences」
- 點選右側「Android」
- 在左側「SDK Location:」欄位後點選「Browse」
- 選擇剛才解壓縮玩的sdk檔案夾
- 按下「Apply」
訂閱:
意見 (Atom)


